Showing posts with label Free Recipes. Show all posts

Tuesday, May 24, 2016

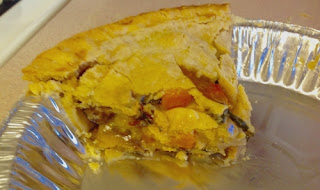
Vegetable Pot-Pie

The only kinds of pot-pie I think I ever had as a kid were the frozen ones from the grocery store. I can understand why my mom would opt for this. From scratch, a pot-pie can be a lot of work. The frozen ones cook up pretty quick in the microwave. I confess, those frozen ones are still guilty pleasures for me, from time to time.

As I started doing more vegetarian cooking, I became intrigued by the idea of a vegetarian version of the pot-pie. How would we create the savory flavors and stew-like filling I wanted, without meat? This recipe, modified from the America's Test Kitchen recipe, hits the mark pretty well. It's got surprising savoriness, and was easier to make than I thought it would be.

The original version of this recipe only used a top crust. I like crust on top and bottom of my pot pie, thank you, so that was the first change. I'm also a bit lazy. They make their own pie crust. I can do it, but I don't like to so, I used store bought crusts. Not as good as homemade, but I'd rather have pie than not. I prefer the rolled up dough, where you just thaw and unroll it over a pie plate. The only kind I've been able to find at my local grocery store, recently, is the kind that's already in a foil plate. You either use what you've got, or you go home so, I used those this time around. They come with two crusts per package, so I needed to thaw them and remove one of them from the pie plate for the top crust. You're more than welcome to make your own pie crust, though.

Equipment needed
9 1/2-inch pie pan (depending on your pie dough source)
paring knife
chef's knife
measuring cups and spoons
large spoon
Dutch oven or other large sauce pan with lid
mixing bowls
whisk
rimmed baking sheet
aluminum foil
pastry brush

Ingredients
2 frozen pie-crust doughs
4 Tbl butter
1 onion, finely chopped
8 oz. cremini mushrooms, trimmed and sliced
salt and pepper
1 medium sweet potato, peeled and cut into 1/2-inch pieces
1 medium turnip, peeled and cut into 1/2-inch pieces
3 cloves garlic, minced
1/2 tsp grated lemon zest
1 Tbl lemon juice
8 oz. Swiss chard, stemmed and cut into 1-inch pieces
2 Tbl all-purpose flour
2 cups vegetable broth
1/2 cup grated Parmesan cheese
1 Tbl dried parsley
1 large egg
1 tsp water
cooking spray

Directions
Thaw the pie crusts (unless you're using fresh). For the top crust, roll one dough smooth between two pieces of parchment paper. Put it in the refrigerator until needed. For the bottom crust, if using loose dough, gently center one in a 10-inch pie plate, leaving about a 1-inch overhang. If not, just leave it in the provided pan. If there are any cracks, smooth them together with a drop of water and your fingers. Lightly spray the bottom pie crust with cooking spray. (My mom says this helps keep the bottom dough from getting soggy.) Refrigerate until needed.

Adjust the oven rack to the middle position and pre-heat the oven to 400 degrees F.

Melt 2 Tbl butter in a Dutch over or other large saucepan over medium heat until the foaming stops. Stir in the onion, mushrooms and 1/2 tsp salt. Cook until the mushrooms release their liquid, about 5 minutes.

Stir in the sweet potato and the turnip. Reduce heat to medium-low, cover, and cook until potato and turnip begin to soften, about 8 minutes. Stir in the garlic, lemon zest, and parsley and cook until fragrant, about 30 seconds. Stir in the chard and cook until wilted, about 2 minutes more. Transfer everything to a bowl and set aside.

Now to make the roux. Melt the remaining butter in the empty pot over medium-high heat, until it stops foaming. Stir in the flour and cook for one minute. Gradually whisk in the broth, scraping up any browned bits from the bottom of the pan. Bring to a simmer and cook until it starts to thicken, about 1 to 2 minutes. Off the heat, whisk in the Parmesan, lemon juice, and 1/2 tsp salt. Stir in the reserved vegetables, along with any juice that's accumulated in the bottom of the bowl. Season with salt and pepper to taste.

Line a rimmed baking sheet with aluminum foil and place the prepared bottom pie crust/plate in the center. This will help keep your oven clean in case the filling boils-over, ease clean up, and makes it easier to put the pie in the oven if you happen to be using a foil pie plate. Transfer the vegetable mixture into the bottom crust of the pie, and smooth the top. Place the top crust on top. Fold up the bottom edge of the dough around the top dough, and crimp together. Cut four 2-inch slits in the top, with a paring knife, to vent the steam. Lightly beat egg and water in bowl, and brush over the top of the crust. Put the whole thing into the oven. Bake until the crust is golden brown and the filling is bubbling, about 30 minutes. Remove and let cool, on the baking sheet for 10 minutes or so before serving.

Makes 6 servings.


Friday, May 29, 2015

How to Make Candied Ginger

As you may know, I'm a fan of “do-it-yourself” when it comes to the kitchen. Making your own food products is a great way to supplement your pantry, and can be cheaper than buying them ready made. It's easier than you might think. In keeping with the kitchen DIY spirit, I decided to take on candied ginger.

Candied ginger has three ingredients: ginger, sugar, and water. There are many recipes out there; I just happen to like this one. The advantages of making your own candied ginger are many. It tastes better than the supermarket stuff, for starters. In addition, the byproduct of making it is ginger syrup – a miraculous food stuff all on its own. Bonus!

Candied ginger can be added to so many things, cookies, cakes, sweet potatoes, pumpkin pies … the list is long and illustrious. I've been told it's good for you, too. It's an old cure for nausea and seems to reduce gastric inflammation. Some people say it even has a positive effect on some cancers. I just like snacking on it. It's pungent, sweet, spicy, and really kicks your taste in the buds.

Ginger syrup is wonderful. Use it to sweeten teas (herbal in my case), or kick up cold drink – think mock ginger ale, ginger lemon-lime soda, or ginger cola. Pour it over pound cake instead of some other syrup or glaze. I like it on vanilla ice cream.

Note: Young, fresh ginger root is preferred because it's got a milder flavor and is more tender. The older ginger will work just fine, though.

Equipment Needed
chef's knife
spoon or vegetable peeler
chef's knife
medium saucepan
strainer
wire drying racks
rimmed baking sheet

Ingredients
2 ¼ cups sugar, separated
2 cups water
8 ounces of fresh ginger

Directions
Break the fingers of ginger apart, and peel them. You can use a vegetable peeler, but it easier to get around the knobbly bits by scraping it off with a spoon. Cut the peeled ginger into thin slices.

Place the wire cooling racks inside a rimmed baking sheet and set aside.

Combine 2 cups of the sugar and water in a medium saucepan over medium heat. Bring it to a simmer, stirring occasionally, until the sugar dissolves and it looks clear. Stir in the ginger slices. Reduce the heat to medium low and simmer until the ginger is tender and translucent, stirring occasionally, about 45 minutes.

Drain the ginger using a strainer set over a large bowl to collect the syrup. Set the syrup aside to let it cool.

Transfer the ginger to the cooling rack. Spread the ginger pieces out a bit, so they don't touch each other. Let the ginger dry until it's no longer moist, but still a little tacky. This will take at least 6 hours, but should be done in no more than 12 hours.

Combine the dried ginger and the remaining ¼ cup of sugar in a large bowl, and toss until well coated. You'll have some sugar left over, that's okay. You can use it to sweeten your drinks or something.

This is where your patience will pay off. If you don't wait until the ginger is dry before you toss it with the additional sugar, you'll end up with gummy ginger pieces that will cement themselves together.

Candied ginger can be stored in an airtight container at room temperature for about 2 weeks. Once the syrup is cooled, transfer to a jar and refrigerate.

Makes about ¾ cup of candied ginger, and about 2 cups of ginger syrup.

Looking at the cost
The joy of cooking aside, is it worth the cost and time? I have no idea how much electricity or natural gas this takes, so I can't account for that. Just keep it in mind as you read my cost breakdown.

The cheapest I found for a 16 oz bag of “crystallized ginger” was $4.99, or about 30 cents an ounce. From what I've been able to figure, there's about 6 oz of candied ginger per cup, so the yield of this recipe it about 4.5 oz. Commercially, that's about $1.40 worth of candied ginger. Keep in mind that this candied ginger isn't very chew-able. The more tender stuff, which is comparable with the candied ginger in this recipe, goes for as much as $11.99 a pound, or 75 cents per ounce. Compared to that product, making your own candied ginger comes in at about $2.53 worth of candied ginger.

Ginger root, at my local grocery, is $3.69 per pound, or 23 cents per oz. This recipe uses 8 oz of ginger, so that's $1.84. A 4 pound bag of sugar costs $1.50. At 2 cups of sugar per pound, that's about 38 cents worth of sugar. The total cost for the ingredients, then, is $2.22. Remember, that doesn't count the cost of heat or your time. It seems to only be cost effective if we're comparing it with the “good stuff.” With the added cost of heat and time, we're lucky to break even, so far.

Except we also get 2 cups of ginger syrup out of the bargain. Just like commercial candied ginger, the price of ginger syrup varies widely with the quality. Some of these syrups have all kinds of added preservatives and stabilizers and artificial flavors. I found the cost of ginger syrup varying from about 25 cents per oz, for the cheap stuff, to about $1.50 per oz, for the good stuff. At 16 oz, that means anywhere between $4.00 and $24.00 worth of ginger syrup. We get it for free, as a byproduct.

Okay, so at its lowest commercial cost, we're making at least $6.22 worth of gingery goodness for $2.22, plus the cost of the heat and time. That's a bit less than $4 savings, and that's comparing it to the cheap stuff. At best, we're making about $26.00 worth of product, that's a $20.00 savings. I don't think we're actually saving that much, but it suddenly seems a lot more cost effective to make it ourselves.


Tuesday, May 12, 2015

Herbed Rice Pilaf with Almonds - International Side

The classic American meal, as I recall it, consists of an entree, and two side dishes - one starch, one veggie. Once you get tired of mashed potatoes or bread for the starchy side, though, you start to come around to rice. Rice is a great grain. I love it and so do millions of other people, worldwide. Rice can be a little bland by itself, though. In our case, we're going to kick up the rice's flavor by adding a few herbs to make a fluffy, savory, side dish.

Traditionally, a pilaf is a rice dish cooked in broth and seasoned with herbs and spices. Not all pilafs are the same. It's origins are in the middle east, but variations can be found throughout east Africa, as well as central and southern Asia. Pilafs vary as widely as the cultures it came from, and the cultures where it spread, which is just about everywhere. Some people add meat and veggies, but that goes beyond what we're going to do with, here. For me, it's all about fluffy rice with herb-packed goodness.

Don't think for a minute you have to use the herbs I've listed. Try a few spices, while you're at it. Is the entree turkey with sage? Tie it together by adding sage. BBQ Chicken? Spice it up with paprika and a pinch of cayenne. Play around and make it your own.

Note: I've indicated dried thyme and parsley, because that's what I normally have on hand. You can substitute 1 teaspoon of freshly minced thyme, if you'd like. If you don't have fresh parsley on hand, you can used dried parsley. Add it along with the thyme before cooking the rice, though, or it won't give up it's flavor as well.

Equipment Needed
cutting board
chef's knife
non-stick skillet
saucepan
long handled cooking spoon
measuring cups and spoons
garlic press (optional)

Ingredients
1 small onion, minced
2 garlic cloves, minced
½ cup sliced almonds.
3 Tablespoons butter
Salt and black pepper as needed
1 ½ cups long-grain rice
½ teaspoon dried thyme
1 bay leaf
2 ¼ cups chicken broth
¼ cup fresh, chopped parsley.

Directions
Toast the almonds in a dry, non-stick skillet over medium heat until fragrant and toasty, about 4 minutes. Keep them moving so they don't burn. Remove from the heat and transfer them to a plate to cool.

Melt the butter in a medium to large saucepan over medium-high heat. At the onion and a pinch of salt. Cook until just softened, about 3 minutes.
Add the rice and cook, stirring frequently, until the edges start to turn translucent, about 2 minutes. This denatures the starches and helps the rice stay fluffy, not sticky.

Add the garlic, thyme, bay leaf, and dried parsley. Cook, stirring constantly, until fragrant, about 30 seconds.

Stir in the chicken broth and bring the mixture to a boil. Cover, reducing the heat to low, and cook until most of the liquid is absorbed and the rice is tender, about 20 minutes. Remove from the heat and let it stand, covered, for 10 minutes more.

Discard the bay leaf and fluff with a fork. Stir in the almonds and fresh parsley, if using. Season with salt and black pepper to taste.

Makes 4 – 6 servings.


Wednesday, August 6, 2014

Macaroni and Cheese for Adults

Let us all bow our heads in thanks to Kraft Foods for packaging macaroni and cheese in a form we don't have to turn the oven on to make. My kids love it, anyway. My youngest thrives on the stuff. That and ramen noodles. It's cheap, and a lot of people will eat it.

Except my wife. I'm not a real fan, either. I don't hate it like my wife does, but I can't stand to eat it like it is. The sauce is usually runny and, although it's made with cheese by-products (what the heck is a cheese by-product?), tastes like its was only placed next to real cheese in the hopes that it might get an idea of what it should taste like. It didn't work, but hey, they tried.

I've always got to add something to it, too. Cut up hot dogs, creole seasoning, and catsup come to mind. Everything crappy tasting gets covered up by catsup and hot sauce, doesn't it?

As much as my kids love the packaged stuff, and the off-brands are too expensive, I'm all about good flavor. I want a macaroni and cheese dish an adult can enjoy. Something I can enjoy without trying to drown out the taste with cayenne pepper and castup. Something that actually tastes like it has cheese in it instead of cheese byproducts.

This recipe for macaroni and cheese does exactly that. As much as I like Noodles and Company as a fast food chain, I like this mac and cheese much better than theirs. Or the stuff at the supermarket deli. Sorry guys. I'm eating at home, tonight.

Fresh bread crumbs work best. Don't bother with over-priced, days old crap from the grocery store. Pulse 3 slices of bread in your food processor until they turn into course crumbs. It will take you all of 2 minutes and it's much tastier.

If you can, use whole milk. 2%, or skim milk, won't be creamy enough. If you're going to go all out with real cheese, it makes no sense to skimp on the milk.

Equipment Needed
Small saucepan or microwave safe bowl
Mixing bowls
Measuring cups and spoons
Large pot or Dutch oven
9” x 13” baking dish
Rubber spatula

Ingredients
8 Tbl unsalted butter, divided
2 cups fresh breadcrumbs
1 Tbl salt
1 lb elbow macaroni, or other small curvy pasta
1 garlic clove, minced
1 pounds colby-jack cheese, shredded (about 4 cups)
8 oz. extra-sharp cheddar Cheese, shredded (about 2 cups)
1 tsp dry mustard
1 tsp water
1/4 tsp cayenne pepper (optional)
6 Tbl all-purpose flour
3 1/2 cups whole milk
1 3/4 cups chicken broth or vegetable broth.
salt and pepper, to taste
cooking spray

Directions
In a large pot, bring 4 quarts of water to a boil over high heat.

While you're waiting, combine the mustard and water in a small bowl. Stir until smooth and set aside.

Melt 2 Tbl of butter in a small saucepan over medium heat (or use the microwave, about 30 seconds). Toss with the breadcrumbs and set aside.

Once the water is boiling, add 1 Tbl salt and the macaroni. Cook until mostly tender, about 10 minutes.

While the pasta is cooking, preheat the oven to 400 degrees Fahrenheit, making sure the top rack is in the middle position.

Drain the cooked pasta in a colander, and leave it to fully drain while you continue.

Wipe the pot dry and return to the stove. Over medium heat, add the rest of the butter to the pot to melt it. Stir in the garlic, mustard mixture, and cayenne pepper. Cook about 30 seconds, until fragrant. Stir in the flour and cook until golden, about 1 minute.

Add the milk and broth slowly, whisking it into the flour mixture until smooth. Bring it to a simmer, reducing the heat to medium-low sow it doesn't boil. Cook until slightly thickened, whisking it often to avoid burning; about 5 or 6 minutes.

Remove the sauce from the heat and whisk in the colby-jack and cheddar cheese until it's completely melted into the sauce. Season with salt and pepper to taste.

Stir in the cooked macaroni, breaking up any clumped bits, until well combined.

Spray a 9” x 13” baking dish with cooking spray. Pour the macaroni mixture into the dish and spread evenly with a rubber spatula. Sprinkle the breadcrumb mixture evenly over the top.

Bake on the center rack until golden brown and bubbling; about 30 minutes.

Remove from the oven and let cool for 10 minutes before serving.

Makes 8 servings.

You can easily customize this recipe. Play around with the kinds of cheese you use, just be careful with hard cheeses like extra-sharp cheddar. By themselves, they could make the dish really greasy. I used a combination of extra-sharp cheddar and a colby-jack blend because that's what I had on hand, but straight colby cheese with the cheddar would have stronger flavor. Get creative! Try gorgonzola or blue cheese cut with queso fresco, if want to. Add cooked and chopped bacon or cooked hamburger. Add chili powder with the cayenne and garlic. Brown the butter and add Andouie sausage. Why not? If you come up with something interesting, I'd love to hear about it in the comments, below.


Thursday, June 5, 2014

Spaghetti and Meatballs - A Meaty Romance

What could be more romantic that the scene in Disney's Lady and the Tramp where our protagonists share a plate of spaghetti and meatballs, ending in their first kiss? Swoon!

Am I the only one that has a hard time thinking of wads of meat as romantic? It's just weird. Pasta, maybe, but cooked meat wads? They were dogs. Dogs are meat eaters. I guess is makes a kind of perverse sense. But, seriously?

Romance aside, it's hard to beat a tasty, moist meatball, smothered in thick tomato sauce, gently resting on top of a pile of spaghetti, cooked just al dente. Sigh. Maybe I'm a romantic after all.

First, meatballs should be tender. I don't want to bounce them off the walls or play table tennis with them, thank you. Fortunately, this recipe delivers in that department. I make a quick tomato sauce of my own for use with this recipe, but you can use canned, if you must.

Grating your own Parmesan is best. The measurements given are for the grated form, not the solid block form. In case you don't know, bulk sausage is sausage sold before being formed into casings. If you can't get it that way, remove the meat from the casings before proceeding.

Equipment Needed
cutting board
chef's knife
garlic press (optional)
saucepan
measuring spoons
wooden spoon
mixing bowls
large skillet

Ingredients

For the sauce:
2 cloves garlic, minced
2 Tbl extra-virgin olive oil
2 14.5-oz cans, diced tomatoes
1/2 Tbl dried basil (or 2 Tbl fresh, minced)
1/4 tsp sugar
salt and pepper as needed

For the meatballs:
1 clove garlic, minced
1/4 grated Parmesan cheese
2 slices good white bread
1/3 cup buttermilk or plain yoghurt
3/4 pound of ground beef (80% lean)
1/4 pound of bulk Italian sausage, mild
1 Tbl dried parsley (or 2 Tbl fresh, minced)
1 large egg yolk
3/4 tsp salt
1/4 tsp ground black pepper

olive oil
1 pound spaghetti noodles
More grated Parmesan cheese, for serving

Directions

Pour about 4 quarts of water into a large cooking pot and set it on a a cold burner. Don't start heating it just yet. We just want it to be ready to go.

For the sauce:
Add the olive oil to a saucepan. Heat both over medium heat until the oil is just starting to shimmer. Add the garlic and cook until fragrant, but not brown, about 30 seconds. Stir in the canned tomatoes, along with the canning liquid, and the dried basil. If using fresh basil, save it for later. Using an immersion blender, blend the tomato mixture enough to break up the heavy dice, but still leave small chunks. Bring to a simmer and cook until slightly thickened, about 20 minutes. Stir in the sugar and season with salt and pepper to taste. If you are using fresh basil, add it now. Set aside.

For the meatballs:
Cut the crusts from the bread and tear into small pieces. Add the bread and buttermillk, or yogurt, to a large bowl and mash into a paste. The Italians call this a “panada.” Add the ground beef, Italian sausage, grated Parmesan, egg yolk, minced garlic, 3/4 tsp salt and 1/8 tsp pepper to the bread mixture. Stir to combine.

Using 2 – 3 Tbl of the meat mixture at a time, roll it between your palms to form them into 1 1/2-inch balls. You'll end up making about 12 - 13 meatballs, this way. Make sure they're packed pretty well, so they don't fall apart while cooking, but don't overdo it.

Now is the time to turn the heat under the pasta water up to high, to bring it to a boil.

In the meantime, pour olive oil into a skillet to a depth of about 1/4 inch. Heat over medium-high until the oil starts to shimmer. Carefully add the meatballs, one at a time in a single layer. Cook until nicely browned, gently turning once through the cooking cycle, about 10 minutes. Remove the cooked meatballs from the pan and transfer them to a paper towel line plate. Pour off the remaining oil in the skillet to discard it.

Reduce the heat to medium and return the skillet to the stove. Pour in about a cup of the sauce and deglaze the skillet, scraping up the yummy browned bits (or “fond”) off the bottom. Stir in the rest of the sauce and bring to a simmer. Reduce the heat to low and return the meatballs to the skillet. Cover and let simmer while the pasta cooks.

The pasta water should be boiling about now. Add the spaghetti and 1 Tbl salt. Cook until al dente, about 10 minutes. Reserve 1/2 cup of the cooking liquid and drain the rest.

Remove the meatballs from the sauce and set aside on a clean plate. Add the reserved pasta water to the tomato sauce and stir in to “loosen” the sauce. Taste the sauce, adjusting the seasoning if needed. Pour the sauce over the cooked spaghetti and toss to coat.

Divide the pasta between four bowls. Top with meatballs, more grated Parmesan cheese as desired, and serve.

Makes 4 large servings.


Sunday, June 1, 2014

The Joy of Cooking (Cheeseburger) Pizza

As a kid, I thought there were only a limited number of things that you should put on a pizza. Things like pepperoni, Italian sausage, peppers, olives, tomatoes, mushrooms, onions, cheese, and the like. You know. All the things you can order at any local pizza chain. As an adult, I put away childish things (except for acting childish once in a while) and learned that there is so much more out there in pizza land. Chicken, artichoke hearts, fresh herbs, eggs, broccoli, spinach … well, I'll skip the spinach, but you get the idea.

Let's face it. Pizza is basically flat bread with edible stuff on it. Why limit ourselves to just a few ingredient combinations? And don't think that cheese and sauce are sacred. Not all pizza has cheese. Early Italian pizza was just sauce baked flat bread with tomato sauce. American's added the cheesy bits. Not all pizzas have sauce, either. Some just pile the other ingredients on. I'm not suggesting we treat pizza like herbed foccacia with a few olives dotted on it (although we could). Let's just broaden our horizons a little.

A few months ago I got this weird idea of turning various classic salads and sandwiches into pizza. I've since learned there are a few chefs already doing that, but more than one person can have a good idea so, I'm not going to apologize.

What about a cheeseburger pizza? That's a classic American sandwich. I fooled around, making a couple different ways, and they were pretty good. I have no idea what the actual ingredient amounts were. I was winging it. The listed ingredient amounts are guesses. Just don't put on too much of any one thing. When it comes to pizza, piling too much stuff on doesn't make it better.

When I make cheeseburgers, I use sharp cheddar. Because cheddar can get greasy when it melts, which is fine when it drips off the burger, but not so fine on a pizza, I opted for a combination of mozzarella, colby, and Monterey jack.

Ingredients
pizza dough
1 Tbl vegetable oil
1 small yellow onion, chopped
1 clove garlic, minced
1 half pound ground beef
3 Tbl cup tomato sauce
1/3 cup mayonnaise
1 cup grated mozzarella cheese
3 Tbl dill pickle relish
1 half tomato, diced
2 cups colby jack cheese (or a bit of colby and Monterey jack), grated
1 leaf romaine lettuce, torn into 2 inch pieces
1 ½ Tbl catsup
salt and pepper

Directions
Heat the vegetable oil in a heavy skillet over medium heat, until shimmering. Add half of the onion, setting the rest aside, and a dash of salt. Cook, stirring occasionally, until just softened. Add the ground beef, breaking it up with a wooden spoon, and cook until no longer pink. Stir in the garlic and cook for about 30 seconds more, until fragrant. Remove from heat and let cool.

Preheat the oven to 425 degrees, Fahrenheit.

Roll out the pizza dough onto a pizza pan, baking sheet, or whatever you use for pizza, and let it rest while you get everything else ready.

Mix the tomato sauce and mayonnaise together, about 3 parts mayo to 1 part tomato sauce. Add salt and pepper to taste. Better yet, use my fry sauce recipe. Spread the sauce in a thin layer over the pizza dough. This is the “secret sauce” part of the burger.

Sprinkle the mozzarella cheese evenly over the sauce. Next, sprinkle the ground beef/onion mixture, chopped tomato and the remaining chopped onion. Lastly, sprinkle on the colby jack cheese.

Bake in the oven for 15 to 18 minutes, or until the dough is cooked through and the cheese is melted and toasty. Rotate the pan halfway through, to ensure even cooking. Remove from the oven.

Squeeze most of the liquid from the pickle relish, and dot all over the pizza. Decoratively squeeze catsup in thin lines, next (I used a crosshatch pattern). Finally, spread the lettuce pieces over the pizza. Slice and serve.


Please don't consider my recipe gospel. Add various herbs and spices to the meat mixture. Hold the pickles; hold the lettuce. Use mustard. Blue cheese, would be a great substitution for the, colby-jack mixture. The point is to have tasty, tasty, pizza fun.

Saturday, February 23, 2013

Ham and Asparagus Frittata


My goodness, it’s been a while. Along with my work schedule, I’ve gone back to school. That’s been taking up quite a bit of my time. It’s past time to talk about food, again.

Frittatas are wonderful mixtures of eggs and other savory ingredients. In this case, were; using ham, asparagus, and cheese. You may want to wait until late spring to use asparagus, when it’s in season. Other vegetables can easily be substituted, though. Unlike omelets, frittatas are finished in the oven. Unlike quiche, there’s no crust. They’re quite easy to prepare, and make a great brunch or weekend breakfast. Breakfast food for dinner is fun, too.

Equipment Needed
cutting board
chef’s knife
box grater
measuring cups and spoons
whisk
mixing bowls
rubber spatula
non-stick, oven-proof skillet

Ingredients
1/2 lb. asparagus
2 oz. deli ham, cut into 1/2-inch pieces
1 Tbsp oil
1/2 onion, finely chopped
1/2 cup of grated gruyere, or other crumbly or hard cheese
6 large eggs
1/4 tsp salt
1/4 tsp ground black pepper
2 Tbsp minced fresh parsley, or 1 tbsp dried parsley

Directions
Trim the woody stalks from the asparagus and cut on a bias into small pieces, about 1-inch long. Leave a few trimmed spears whole if you feel adventurous.

Adjust an oven rack to the upper middle position and preheat to 350 degrees Fahrenheit.

In the meantime, beat the eggs in a mixing bowl. Whisk in the cheese, parsley, salt and pepper, and set aside.

Heat the oil in a medium sized, oven proof skillet over medium heat, until shimmering. Add the onion, asparagus and ham. Cook until the onion is softened, stirring frequently, about 4 – 5 minutes.

Add the egg mixture to the skillet and gently stir with the rubber spatula. Cook until the eggs on the bottom start to set, about 30 seconds. Gently pull the cooked eggs back from the edge of the skillet towards the center. Tilt the skillet slightly to let any uncooked egg run to the clear edge. Repeat, working around the skillet, until the eggs are mostly set on top, but still moist, about 1 or 2 minutes.

Transfer the skillet to the oven and bake until the top is set and dry to the touch, about 3 minutes.

Run the spatula around the skillet edge and bottom to loosen the frittata and invert onto a serving plate. Cut into 4 to 8 pieces. Frittatas can be served warm, at room temperature, or chilled.

Makes 4 servings.

Tuesday, October 16, 2012

Broccoli and Garlic Alfredo


Alfredo sauce is a rich, delicious, creamy classic for pasta. Sometimes it can get boring, though. It can be a bit much as a main course, too. Some people will kick it up by adding a cooked chicken breast. Not a bad choice, but white on white seems a bit much for me, most days. What about adding a bit of green and use up some leftover broccoli, instead? Some garlic would be nice, too. Traditional Alfredo sauce doesn't have any.

Equipment needed
rasp grater
measuring cups and spoons
Dutch oven or large pot
large nonstick skillet
colander
whisk

Ingredients
1 small head of broccoli
1 tablespoon olive oil
1 clove garlic, minced
1 cup Parmesan cheese, grated
2 cups heavy cream
1 pound spaghetti or other pasta
2 tablespoons butter
pinch of nutmeg
salt and ground black pepper, as needed
chopped fresh parsley (optional)

Directions
Remove the florets from the broccoli, cutting any large ones in half. Remove the tough outer layer from the stem. Cut the peeled stem into 1-inch pieces.

Bring 4 quarts of water to boil in a large pot or Dutch oven.

In the meantime, heat 1 tablespoon of olive oil in a large skillet over medium heat until shimmering. Add the broccoli and saute until tender, about 5 minutes. Stir in the garlic and cook until fragrant, about  30 seconds. Add the cream to the skillet and reduce the heat to a simmer. Cook until thickened, about 8 minutes, stirring occasionally. Cover and keep warm.

When the water comes to a boil, add 1 tablespoon of salt and the pasta. Cook, stirring occasionally, until the past is tender but still a little firm, about 10 minutes. Reserve 1/2 cup of the pasta water, then drain the pasta and return it to the pot.

Working quickly, whisk the butter, nutmeg, and Parmesan cheese into the cream mixture. Season with salt and pepper to taste. Add the sauce to the pasta and toss to coat. If the sauce is too thick, add some of the reserved pasta water, just a little at a time, to loosen. Garnish with additional Parmesan cheese, ground black pepper, or chopped parsley, if desired

Makes 6 to 8 servings.

Sunday, September 23, 2012

The Classic Reuben


Sometimes, you just want a big sandwich. I’m not talking about peanut butter and jelly, although I enjoy those quite a bit. I’m talking lots of deli meat, cheese and other stuff hot off the grill. Enter, the Reuben sandwich.

The classic Reuben is a hot sandwich, chock full of corned beef, with swish cheese, thousand island dressing and sauerkraut, served on rye bread and then grilled. Several variations exist including the Rachael, substituting pastrami or turkey for the corned beef and coleslaw for the sauerkraut. On the west coast and in Vegas they substitute Dijon mustard for the thousand island dressing. In Florida they really get weird, substituting grouper for the corned beef and using coleslaw.

The origin of the Reuben depends on who you talk to. One account credits Reuben Kulakofsky, a Lithuanian-born grocer from Nebraska. It may have been a group effort by Kulakofsky and his poker buddies. They held a weekly poker night in the Blackstone Hotel between1920 and 1935. The sandwich first gained local fame when Charles Schimmel, the hotel’s owner, put it on the Blackstone's lunch menu.

Another account credits Arnold Reuben, the owner of the once-famous Reuben's Delicatessen in New York. According to an interview with Craig Claiborne, Reuben invented the "Reuben special" around 1914. A few others are around as well, blaming different culprits and celebrities. Whatever story is true, this is a filling and satisfying sandwich.

Equipment needed
mesh strainer
measuring cups
non-stick skillet
dutch oven, stockpot, or cast iron skillet
cooling rack
rimmed baking sheet
spatula

Ingredients
1 pound sauerkraut
2 tablespoons butter, or more as needed
8 slices rye bread
3/4 cup thousand island dressing
8 slices Swiss cheese (8 ounces)
1 1/5 pounds corned beef, thinly sliced

Directions
Rinse the sauerkraut in a mesh strainer under cold running water. Drain well and squeeze out as much excess moisture as you can.

Preheat the oven to 200 degrees.

Assemble the sandwiches by layering the ingredients as follows:
1 slice rye bread
1 tablespoon dressing
1 slice Swiss cheese
1/3 cup sauerkraut
another tablespoon dressing
6 ounces corned beef
another slice of Swiss cheese
1 more tablespoon of dressing
1 slice of rye bread on top

Press gently down on the sandwich to set everything together.

Heat a large non-stick skillet over medium-low heat. Spread 1 teaspoon butter over one side of each sandwich and put them in the hot skillet, butter-side down. You should be able to do two sandwiches as a time. Place a dutch oven, stockpot, or a cast iron skillet over the top as a weight to press them down. Cook until crisp and golden, about 3-5 minutes. Remove the weight and spread more butter on top. Flip the sandwiches, replace the weight, and cook for another 3-5 minutes. Transfer to a wire rack set over a baking sheet in the oven to keep them warm while you cook the remaining sandwiches. Cut them in half if desired. Serve with pickle and potato chips.

Makes 4 sandwiches.

If you have an electric grill, or pannini grill, the process is much simpler. Butter both sides of the sandwiches and cook until crisp and golden.

Sunday, August 12, 2012

Cuban Black Beans – Not Just for Ricky Ricardo


When Lucy Ricardo got in trouble in the I Love Lucy TV show, she might have less “splainin’ to do” if she’d softened up Ricky’s heart with this Cuban black beans and rice recipe. Sauteed vegetables, bacon, cumin, and chorizo, give these beans an authentic Cuban flavor. Serve them with plain white rice and lime wedges. You can add sour cream or hot sauce, if you want, but I don’t think they need much dressing up.

You’ll want to use dried, Spanish style chorizo in this dish, not the fresh Mexican kind. My local supermarket doesn’t carry it, but they do carry a chorizo sausage made by Colosimos, an excellent local sausage company. I cook it that up to use in place of the Spanish chorizo.

The original recipe calls for 1/4 cup minced cilantro. I like cilantro, but not enough to buy it. It has a kind of  “soapy” aftertaste to me, so I’ve substituted dried parsley.

Equipment Needed
Cutting board
Chef’s knife
Garlic press (optional)
Measuring cups and spoons
Dutch oven or large pot.
Colander
Large spoon

Ingredients
2 slices bacon, cut into small peices
2 onions, chopped
1 red bell pepper, chopped
6 cloves garlic, minced
1/2 pound chorizo sausage, cooked or dried and cut into 1/2 pieces
2 cans (15 oz) blacks beans, rinsed and drained
1 teaspoon cumin
1 teaspoon salt
3/4 teaspoon oregano
2 bay leaves
1/2 cup chicken broth
1/4 teaspoon red pepper flakes
1 tablespoon dried parsely
Ground black pepper
Cooking oil

Directions
Heat 1 teaspoon oil in a large Dutch oven over medium heat. Add the bacon and cook until crisp, about 6-8 minutes. Stir in the onions, bell pepper, cumin, and salt. Continue cooking until the vegetables are softened, about 8 minutes.

Stir in the garlic, red pepper, and oregano. Cook until fragrant, about 15 seconds.

Add the broth, bay leaves, beans, parsley, and sausage. Simmer, stirring occasionally, until the broth reduces and thickens, about 10 minutes. Remove the bay leaves. Season with salt and black pepper, to taste. Spoon the beans over rice and squeeze a bit of lime juice over them.

Makes 8 servings.

Tuesday, July 31, 2012

Spicy Beef Nachos


When I was in my early 20’s, nachos from the local convenience store were a staple food in my bachelor's life. Little did I know how much more they could be, beyond stale tortilla chips and hot cheese sauce. Little did I know how much better they would taste if I made my own. Being older and wiser, I’ve learned how to make killer nachos. Tasty, spicy, cheesy beef nachos that won’t last long once you set them on the table. They’ll be gobbled up too fast for any left overs.

Make sure to use very lean ground beef in this recipe. There’s a lot of cheese, and lots of cheese means lots of grease, if you’re not careful. I think these nachos have just the right amount of kick for a family dinner or gathering, but you can certainly spice them up more, or serve hot sauce on the side, if you like.

Equipment needed
Cutting board
Chef’s knife
Box grater
Measuring cups and spoons
Large skillet
Large spoon
9” x 12” baking dish, glass is preferred
Garlic press (optional)

Ingredients
1 yellow onion, finely chopped
1 clove garlic, minced
1 green bell pepper, finely chopped
2 green onions, thinly sliced
4 cups sharp cheddar cheese, grated
2 teaspoons canola oil
1 tablespoon chili powder
1/2 teaspoon cumin
1/2 teaspoon coriander
1/4 teaspoon dried oregano
1/4 teaspoon cayenne pepper
1/4 teaspoon salt
1/2 pound lean ground beef (90% or leaner, preferred)
8 ounces tortilla chips (2/3 of a large bag)
1 1/2 cup tomato salsa
1 cup sour cream
Cooking spray

Directions
Place an oven rack in the center position and preheat to 400 degree Fahrenheit.

Heat the oil in a large skillet over medium heat until shimmering. Add the yellow onion and a dash of salt. Cook until softened, occasionally stirring, about 5 minutes. Stir in the garlic, spices, and salt. Cook about 30 seconds, until fragrant.  Add the ground beef and green bell pepper. Cook, breaking the meat up with a  spoon, until no longer pink, about 5 – 7 minutes.

Spray a 9” x 13” glass baking dish with cooking spray. Spread half the chips, evenly, over the bottom. Sprinkle half the beef mixture evenly over the chips, then sprinkle half the cheese over the beef. Repeat with remaining chips, beef mixture, and cheese. Bake until cheese is melted, about 9 minutes.

Remove from the oven. Dot with the sour cream and salsa. Sprinkle the sliced green onion over the top and serve warm.

Makes 6 servings

Monday, July 16, 2012

American Potato Salad, Revisited


Potato salad is a summer party tradition in our house. Of course, we don’t always wait for family parties to make it. Sometimes we just make it for ourselves, party or not. 

One of the fun things about potato salad, like other dishes, is that there are so many variations. Trying different recipes of the same dish can lead to some interesting discoveries. Some discoveries are that you never want to make that variation again. Others, like this one, make you change the the way you make. Some traditions are meant to be broken.

Peeling the potatoes is strictly optional. Don’t use sweet pickle relish as a short cut. The potato salad will be more mush and the pickle flavor too strong.

Equipment needed
Cutting board
Chef’s knife
Measuring cups and spoons
Sauce pan
Colander
Mixing bowls
Rubber spatula

Ingredients
3 pounds red potatoes, scrubbed clean and cut into 3/4” chunks.
2 stalks celery, finely diced
4 hard boiled eggs, peeled and coarsely chopped
1/2 cup finely chopped sweet pickle
1/2 red onion, finely chopped
1/2 cup red wine vinegar
1/2 teaspoon salt
1/2 teaspoon pepper
3/4 cup mayonnaise
1 tablespoon Dijon mustard
3 teaspoons dried parsley

Directions
Add the potatoes to a large pot with 4 quarts of water. Bring to a simmer and cook until tender, about 10 to 12 minutes. Drain the potatoes in a colander. Toss the warm potatoes with the vinegar, salt and pepper. It’s easier for the warm potatoes to soak up the vinegar, increasing their brightness and flavor. Refrigerate for 20 minutes.

In the meantime, mix the mayonnaise, pickles, celery, onion and mustard together in a large mixing bowl. Fold in the chilled potatoes and eggs until evenly coated. Add more salt and pepper to taste, if desired.

Makes 8 servings.

Monday, May 7, 2012

Broccoli with Garlic


Sometimes simple recipes are the best. They allow the flavor of just a few ingredients to take center stage. As much as I like to experiment and blend flavors, sometimes I just want to savor the pure flavor of a single perfectly cooked vegetable or fruit.

This recipe highlights broccoli’s natural savoriness with a bit of garlic. The technique is simple, combing braising and sauteing, leaving a tender, satisfying side dish. This technique can be used with other vegetables as well.

The size of the skillet is vital to cooking the broccoli evenly. For this recipe, a 12-inch skillet is ideal. You don’t want to overcrowd the pan, no matter what you’re cooking.

Equipment needed
Cutting board
Chef’s knife
Garlic press (optional)
Measuring cups and spoons
Large skillet (preferably non-stick)
Large spoon
Mixing bowls

Ingredients
1 bunch broccoli (about 1 1/2 pounds)
3 garlic cloves, minced
1/2 cup water
2 tablespoons olive oil
1/8 teaspoon red pepper flakes (optional)
2 tablespoons lemon juice
salt and pepper

Directions
Cut the florets off the broccoli using a chef’s knife. Slice the larger florets in half by slicing through the stem. Break off the woody bottom portion of the stalk and discard. Peel away the tough outer layer of the remaining stalk. Slice the peeled stalks into 1/4-inch thick slices.

Place the cut broccoli florets and stems in the skillet with the water. Cover and cook over medium-high heat until the water is simmering and the broccoli turns bright green, about 2 minutes. Uncover and cook until the water has evaporated and the broccoli is tender, about 5 minutes.

Push the broccoli to the sides of the pan, clearing a space in the center. Add the olive oil, garlic and red pepper flakes, if using. Mash the garlic into the pan using the back of a spoon, mixing into the oil. Cook for 10 seconds and then stir into the broccoli. Remove from the heat.

Stir in the lemon juice and season with salt and pepper to taste.

Makes 4 servings.


Monday, April 30, 2012

Broiled Asparagus


Asparagus is not one of the inexpensive vegetables and it’s no wonder. Farmer’s have to devote two years to it’s initial harvest; it doesn't come up the first year. It’s incredibly tasty, though. As such, you want to make sure you get the most flavor out of it. Broiling asparagus is one way to concentrate it’s delicate flavor and add a lovely caramelized touch. It’s also incredibly fast and easy.

When choose asparagus, try to find stalks with even thickness. I prefer thinner spears, around one-half inch in diameter. This is young asparagus and has the sweetest flavor.

While this recipe calls for extra-virgin olive oil, regular olive oil can be substituted. Served warm or at room temperature, broiled asparagus is a wonderful side to most any meal.

Equipment Needed
Cutting board
Chef’s knife
Measuring spoons
Rimmed baking sheet

Ingredients
1 pound asparagus
1 tablespoon extra-virgin olive oil
1/4 teaspoon salt
1/8 teaspoon ground black pepper
Lemon juice

Directions
Adjust an oven rack to 6 inches under the broiler element and heat the broiler.

Remove one asparagus spear from the bunch and bend it at the thicker end until it snaps. Use the broken asparagus as a guide to trim the woody ends from the remaining asparagus.

Put the trimmed asparagus onto a rimmed baking sheet. Toss the asparagus with the olive oil, and salt and pepper. You can add more salt and pepper, if you like, to taste. Arrange the spears into a single layer on the baking sheet. Broil the asparagus, shaking the pan every few minutes, until they are tender and lightly browned, about 8 minutes. Sprinkle with lemon juice before serving.

Makes 4 servings.

Try sprinkling sesame salt on it along with the lemon juice for an extra hit of nutty flavor.

Sunday, April 22, 2012

Sesame Salt – Wonder Condiment

I came across this simple recipe when looking at a beef soup recipe from Thailand. It’s a simple condiment of toasted sesame seeds and a little salt. To be honest, I liked it better than the soup. It’s an amazing condiment, using only two ingredients. Together, they become super heroes in the kitchen. (Wonder Twin powers, activate!)

 Sesame salt is perfect for any time when you want to add a bit of extra savoriness to a dish. It’s great over soups, salads, or whatever. Give it a try, and kick up your next dish, sesame style.

 Equipment needed 
Mortar and pestle, spice grinder or food processor
Small skillet
Mixing bowl

 Ingredients 
1/3 cup sesame seeds
1/4 teaspoon salt

 Directions 
Coarsely grind the sesame seeds in a spice grinder, food processor, or mortar. Cook in a small skillet over medium heat until lightly browned. Transfer to a bowl and mix in the salt. Let cool completely. Store in an airtight container in a dark cupboard. Use liberally.

 Makes about 1/3 cup.

Sunday, April 15, 2012

Corn Chowder

Corn chowder was one of the first Mexican soups I tried. I really liked it. They say you can tell the quality of a Mexican restaurant by it’s soup. So far, that rule of thumb has worked out for me. The best soups I’ve had seem to come from great Mexican restaurants.

Eating out all the time to get corn chowder, or any other soup for that matter, is ridiculously expensive, though. I had to learn to make my own. I think this recipe stands up pretty well to it’s restaurant relatives.

A hot corn chowder might be best suited for Autumn nights after harvest time, so freshly harvested corn can be used, but it works pretty well for cool spring evenings, too. This recipe specifies two pounds of frozen corn, but ten ears of fresh corn can be easily substituted. I don’t recommend using canned corn. Blech.

Freezing the bacon for about 15 minutes will make it easier to cut, or you can cook it first and cut it later.

Equipment needed
Mixing bowls
Blender or food processor
Cutting board
Measuring cups and spoons
Dutch oven or other large pot
Garlic press (optional)
Large spoons

Ingredients
2 pound frozen corn, thawed
4 slices bacon, cut into small pieces
1 medium yellow onion, finely chopped
2 cloves garlic, minced
2 medium russet potatoes, peeled and cut into 1/4-inch cubes
3 cups chicken broth
2 cups whole milk
2 bay leaves
1/4 teaspoon dried thyme
1 table dried parsley
1 cup heavy cream
Salt
Pepper

Directions
Put half the corn and all the stock into a food processor or blender. Blend until smooth. Set aside.

Cook the bacon in a large Dutch oven or kitchen pot over medium heat until crispy, about 8 minutes. Stir in the onion and cook until soft, about 5 minutes more. Stir in the garlic and cook until fragrant, about 30 seconds.

Stir in the broth mixture and the milk, scraping up any of the browned bits (fond) off the bottom of the pot. Stir in the potatoes, bay leaves, thyme, and parsley. Bring to a simmer and cook until the potatoes and just starting to get tender, about 15 minutes. Add the remaining corn kernels and the cream. Keep simmering until the corn is tender, but still has a bit of resistance to it, and the potatoes are cooked through, about 5 minutes.

Discard the bay leaves. Season with salt and pepper to taste and serve immediately.

Makes 6 servings.

Sunday, March 25, 2012

Chunky Slow-cooker Chili

Many of you already know of my love affair with the slow-cooker. I have a slow-cooker with a removable pot. I particularly enjoy setting things up in the pot on a Saturday night, then pulling the pot out of the refrigerator Sunday morning and letting it do it’s thing all day until Sunday dinner. It certainly makes my Sunday’s less stressful.

I wanted to figure out some way to cook chili in the slow-cooker, but I couldn’t find any recipes that really got me excited. Instead, I modified a stove-top chili recipe that I really like. The original recipe uses ground beef. I had some cheap cuts of beef hanging around my freezer, so I substituted them to make a chunkier version. You can  certainly use hamburger, if you like. Knowing I wasn’t going to get as much of a reduction in the liquid using the slow-cooker, I decided to drain the tomatoes, first. I think the results were pretty tasty.

Equipment Needed
Cutting board
Chef’s knife
Measuring cups and spoons
Garlic press (optional)
Colander
Large skillet
Slow-cooker
Large spoon
Paring knife
Mixing bowls

Ingredients
2 onions, peeled finely chopped
1 bell pepper, chopped
6 cloves garlic, minced
2 cans (15 oz.) dark red kidney beans, drained and rinsed
2 tablespoons vegetable oil
1/4 cup chili powder
1 tablespoon cumin
1/4 tsp cayenne pepper
1 teaspoon salt
2 pounds stew meat or other beef, cut into small chunks
1 can (28 oz.) diced tomatoes, drained
1 can (20 oz.) tomato puree

Directions
Heat the oil in a large skillet over medium-high heat until shimmering. Add the meat and cook until just browned. Transfer to the slow-cooker.

Return the pan to the heat. Add more oil if needed and reduce heat to medium. When the oil is shimmering, add the onions, chili powder, cumin, bell pepper, cayenne pepper and 1/2 teaspoon of salt. Cook until softened, stirring occasionally, about 7 minutes. Stir in the garlic and cook for 15 seconds more, until fragrant. Remove from the the heat and transfer to the slow-cooker. Turn off the stove. Everything else will be done in the slow-cooker.

To the slow-cooker, add the beans, diced tomatoes, tomato puree, and 1/2 teaspoon salt. Stir together. Cook on high for 6 hours, or low for 8 hours. Season with additional salt and pepper, to taste.

Makes 8 servings.


Garnish with sliced scallions, sour cream, grated cheese, chopped onion, or diced avocados as desired.

Saturday, March 17, 2012

TNT: A Dynamite Tuna Recipe

One of many questions that plague those of us who attempt to rotate our one-year’s food storage is, “Just what am I supposed to do with all this canned tuna?” That question is second only to “What am I supposed to do with all this hard wheat?”

I dislike canned tuna. You wouldn't know it, considering the number of recipes I've got that use canned tuna. You see, the rest of my family loves it so, I’m stuck trying to figure out how to cook with it in ways that won’t make my stomach revolt all over the kitchen table.

Fortunately, I understand culinary genius. Not mine, thank you. Everything I know, that works, came from somewhere else. I’m not talking about celebrity chefs, either. I’m talking about the true guardians of the ultimate in culinary creations: Italian grandmothers.

If anyone can take something horrible and turn it into something delicious, it’s little Italian grandmothers. Say what you want about the influence of French cuisine (and I often do), it’s the Italians who make food worth eating. Fortunately for me, I have a couple of cookbooks written by Italian grandmothers. One of them even includes a recipe for tuna noodle casserole that actually tastes great.

Based on a recipe by Juilia de la Croce, this version goes way beyond school cafeteria fare. I've simplified it a bit for everyday cooking. The addition of sour cream gives it creaminess and helps it stay moist in the oven. My wife calls it "T-N-T:" tuna, noodle and tomato. For a tuna dish, I think it's dynamite.

Equipment needed
Mixing bowls
Measuring cups and spoons
Dutch Oven or other large cooking pot with lid.
Medium saucepan
9 1/2 x 13 inch baking dish
Aluminum foil

Ingredients
14 oz. canned tuna, drained
Milk (as needed, optional)
2 1/2 cups Tomato Sauce
1/2 teaspoon Dried Basil
Salt and Pepper, to taste
3/4 pound Egg Noodles, or dried taggliatelle
4 quarts Water
1 tablespoon Salt
2 1/2 cups Sour Cream
Cooking Spray
1 teaspoon Dried Parsley
1/3 cup Grated Romano Cheese, or other hard cheese (optional)

Directions
This first step is optional, but will reduce the "fishiness" sometimes associated with canned tuna. Put the drained tuna into a small bowl and add enough milk just to cover. Let sit for 5 minutes and drain off the milk.

Bring the tomato sauce to a simmer in small saucepan. Add the basil and tuna. Lightly simmer for 3-4 minutes to marry the flavors. Add salt and pepper to taste.

In a Dutch Oven or other large cooking pot, bring water to rolling boil Add salt and pasta. Stir the pasta and cover the pan. Reduce heat to a simmer and cook until halfway done, about 4 minutes. Reserve 1/3 cup of the pasta water. Drain the pasta and rinse in cool water to separate the noodles. Drain well and set aside.

Add reserved pasta water to sour cream and blend. Set aside.

Generously spray a 9 x 13 inch baking dish with cooking spray. Pour 1/3 of the tuna/tomato mixture on the bottom and spread evenly. Arrange 1/2 of the cooked pasta, evenly, over the top. Smear half the thinned sour cream over the pasta. Cover with another 1/3 of the tuna/tomato sauce. Spread remaining pasta over that and cover with remaining sour cream. Finish with the remaining tomato sauce and use a spatula to smooth and blend slightly. Sprinkle parsley evenly over the top. Cover with grated cheese, if using.

Spray the reflective side of the foil with cooking spray first, to help avoid sticking, and cover the pan, reflective side down. Bake on the middle rack of the oven for 10 minutes. Remove foil and continue baking until bubbly, about 5 minutes more. Remove from the oven and allow it to settle for about 5 minutes, then serve.

Makes 8 servings.

Monday, March 12, 2012

Flax Muffins Recipe

Want to add more omega-3 fatty acids to your diet? Need a bran boost for fiber? Step away from the fish counter and the cereal section, brothers and sisters. Head over to the baking aisle for some flax seed meal, instead.

Flax, both seeds and oil, are great sources of fiber and alpha-linolenic acid, the plant version of omega-3. In fact, it contains 150% more fiber than oatmeal, and 500% more omega-3 than the next highest plant based sources, canola and walnut. With all health benefits, you’d think it would takes like a box of cardboard. Instead, flax has a wonderful nutty flavor.

Flax meal, oil, or whole seeds, can be added to a wide variety of baked goods, cereals, or fruit smoothies.. One of my favorite things to do with flax meal  is to make tasty whole-grain muffins. Who said you can’t have your whole-grains and enjoy them, too?

This recipe is chock full of tasty stuff that just happens to be good for you. For sweetness and moisture we add brown sugar, carrots, apples, and raisins (optional). For increased nuttiness and texture you can add chopped nuts or sunflower seeds. The addition of oat flour adds even more robust flavor. In spite of all of this, these muffins won’t weigh your gut down. They’re actually quite light.

Equipment needed
Measuring cups and spoons
Muffin pans
Paper baking cups
Mixing bowls
Large spoon
Whisk
Cooking spray

Ingredients
1 cup all-purpose flour
1/2 cup whole wheat flour
3/4 cup flaxseed meal
3/4 cup oatmeal or oat flour
1 cup brown sugar
2 teaspoons baking soda
1 teaspoon baking powder
1/2 teaspoon salt
2 teaspoons cinnamon
1 /2 cups shredded carrots
2 apples, peeled and finely chopped
1/2 cup raisins (optional)
1 cup chopped pecans, walnuts, or sunflower seeds
3/4 cup milk
2 eggs, beaten
1 teaspoon vanilla extract

Directions
Preheat oven to 350 degrees Fahrenheit. Lightly grease muffin tins with cooking spray, or line with paper baking cups and set aside. Grind the oatmeal to a fine powder in a spice grinder, or use oat flour.

In a large mixing bowl, mix together the different flours, flaxseed meal, oat flour, brown sugard, baking soda, baking powder, salt and cinnamon. Stir in the apples, carrots, raisins (if using) and chopped nuts or seeds. Set aside.

In a separate bowl, beat together the eggs, milk, and vanilla. Pour the liquid ingredients into the dry ingredients and stir until all is well moistened. Do not over mix!

Fill muffin cups 3/4 full with the batter and bake for 15 – 20 minutes. Remove from the oven and let cool in the pan for 5 minutes. Remove from the pan and transfer to cooling racks to completely cool.

Makes approximately 15 muffins.

I like to eat them with jam or cream cheese.

Sunday, November 13, 2011

Low and Slow (Cooker) Beef Stew

I’d be hard pressed to find a food my wife likes better than beef stew. It’s a winter staple for her. We have cans of the stuff hanging around the pantry all the time. I can’t stand the canned stuff. Most of it is crap. To make it palatable I’ve always got to mess with it or I won’t be able to keep it in my mouth long enough to chew and swallow. Making your own is much better, even if it can take all day to do it.

Enter the slow cooker. I love using a slow cooker for cheap cuts of meat. It takes what can be a chewy mess and turns it into a tender and tasty indulgence.

Low and slow is the answer, my friends. Low and slow.

I’m not going to kid you, though. This recipe takes a bit more work than most slow cooker recipes. A bunch of stuff gets cooked a bit before putting it into the crock pot in order to get better caramelization and richer flavor. The results are worth the effort, though. Even my wife agrees.

Now I just need to figure out what to do with all of these extra cans.

Equipment Needed
Cutting board
Chef’s knife
Garlic press (optional)
Measuring cups and spoons
Paper towels
Large skillet
Slow cooker
Large spoons, slotted and non-slotted
Whisk
Vegetable peeler

Ingredients
3-4 pound boneless beef chuck roast
1 large onion, chopped into 1/2-inch pieces
3 cloves garlic, minced
1 pound carrots, cut into 1/2-inch circles
3 medium russet potatoes, peeled and cut into 1-inch pieces
Salt and pepper as needed
2 Tablespoons vegetable oil
1 cup red wine or cooking sherry
2 Tablespoons tomato paste
4 cups beef broth
2 bay leaves
1 teaspoon dried thyme
1/4 cup flour
1 cup frozen peas, thawed
1 Tablespoon dried parsley

Directions
Pull apart the roast along it’s major seams, using a knife as needed. Trim excess fat and silver skin. Cut into 1 1/2-inch chunks.

Heat 2 teaspoons of oil in a large skillet over medium heat until smoking. Brown the beef in batches, about 5 minutes for each batch, and add to the slow cooker. Add more oil as needed.

Reduce the heat to medium, adding 2 more teaspoons of oil until shimmering. Add the onions and a pinch of salt. Cook until softened, about 5 minutes. Stir in the garlic and cook for 15 seconds more, until fragrant.

Stir in the wine and tomato paste, scraping up the browned bits from the bottom of the skillet. Simmer, uncovered, until the wine reduces by half, about 3 minutes. Pour into the slow cooker.

Add the 3 1/2 cups of the broth, bay leaves, and thyme to the slow cooker. Stir in the potatoes and carrots. Cover and cook on low for 8 hours.

Discard the bay leaf. Set the cooker to high. Whisk together the flour and remaining 1/2 cup broth until smooth. Stir into the cooker. Add the peas and parsley. Cover and continue to cook until the sauce is thickened, the flour is cooked, and the veggies are tender, about 30 minutes to an hour more. Season with salt and pepper to taste.

Makes 6 servings